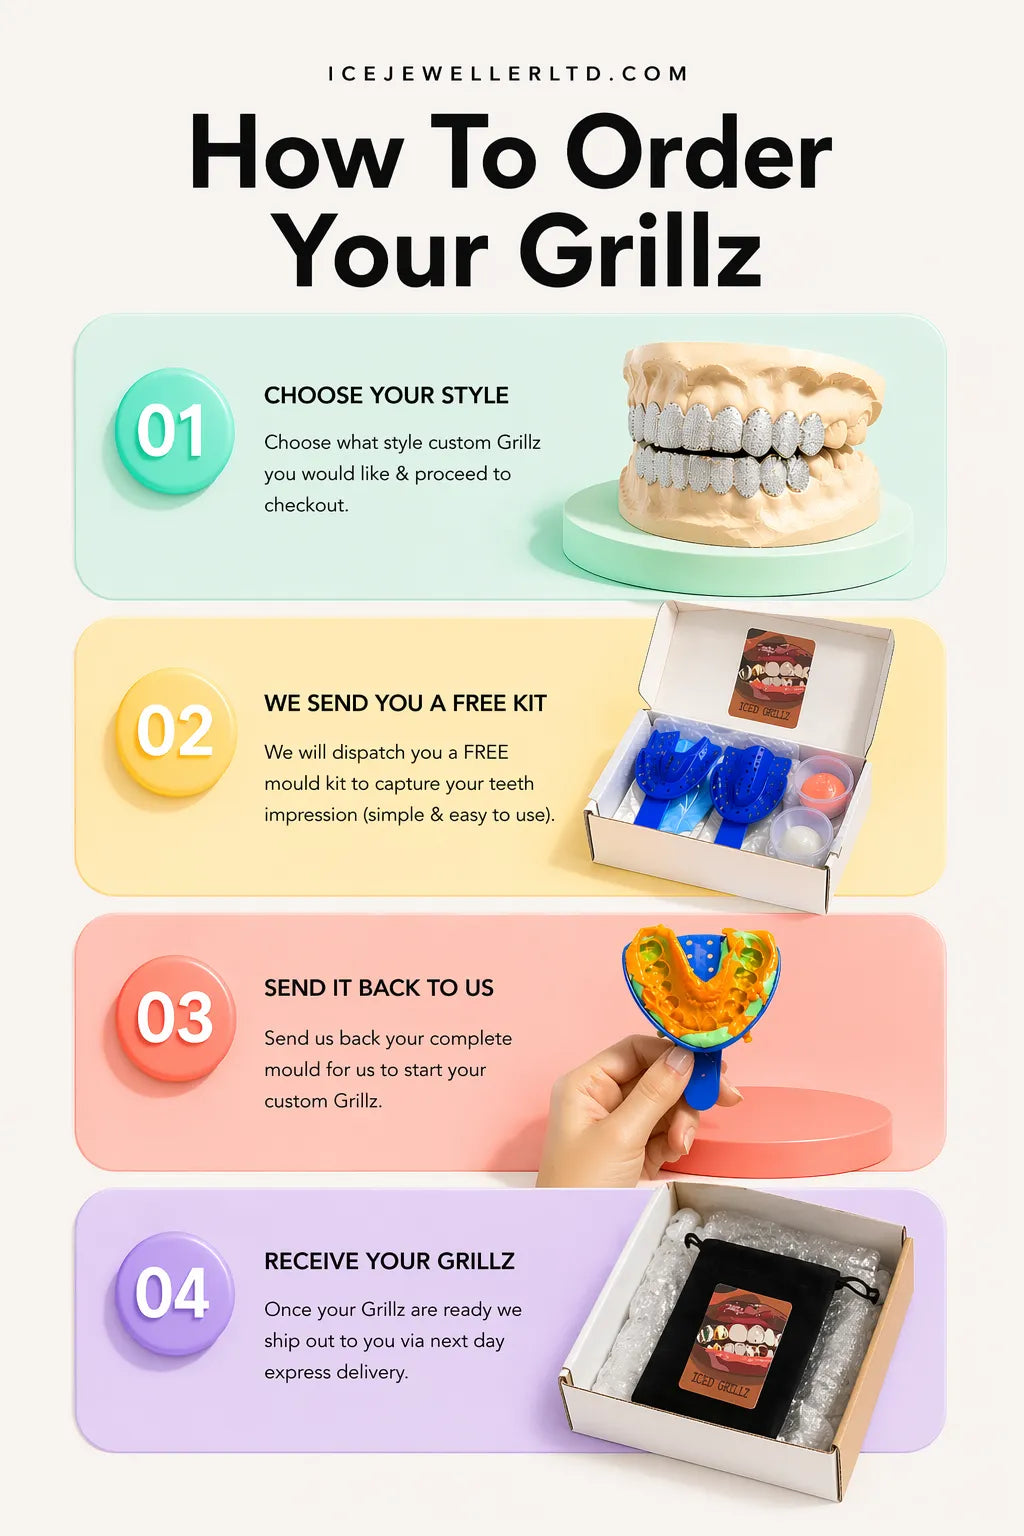
How to Take a Dental Impression for Grillz at Home
The impression is the most important part of the custom grillz process. Your grillz are designed and crafted from the exact shape of your teeth — if the impression is accurate, everything else follows. If it's not, the fit won't be right and you'll be starting over.
The good news is that taking a dental impression at home is straightforward when you know what you're doing. This guide walks you through the process step by step, covers the most common mistakes, and tells you how to judge whether your impression is ready to send.
What Comes in an Ice Jeweller Impression Kit
Your free impression kit contains everything you need:
- Impression trays — upper and lower, sized to fit most mouths
- Alginate impression powder — the material that sets around your teeth to capture their shape
- Mixing instructions and water ratio guide
- Return packaging — pre-addressed for sending your impressions back
Some kits include a small mixing bowl and spatula. If yours doesn't, a clean bowl and a spoon work fine.
Before You Start
A few things to sort out before you mix anything:
Read the full instructions first. Alginate sets quickly — once you start mixing, you have around 2 minutes before it begins to firm up. Knowing what you're doing before the timer starts makes a significant difference.
Have cold water ready. Cold water slows the setting time and gives you more working time. Warm or hot water speeds it up significantly — avoid it. Use tap water at room temperature or slightly cooler.
Clear a clean workspace. You'll be leaning over a sink or bowl, so give yourself space to move without bumping anything.
Don't eat for at least 30 minutes beforehand. Food debris affects the impression surface. Rinse your mouth with water before starting.
Do a dry run. Before mixing any alginate, seat the tray in your mouth (dry, no material) and check it covers your teeth comfortably. If it feels too wide or too narrow, adjust before you mix.
Step-by-Step: Taking Your Impressions
Step 1: Mix the Alginate
Follow the water-to-powder ratio in your kit instructions exactly. As a general guide: add powder to water (not water to powder), then mix vigorously for 45–60 seconds until you have a smooth, lump-free consistency — similar to thick yoghurt or putty.
Work quickly and consistently. Any lumps in the mix will show up as voids in your impression.
Step 2: Load the Tray
Scoop the mixed alginate into the impression tray, filling it evenly. Don't overfill — you want enough material to cover your teeth comfortably but not so much that it overflows into your throat when pressed down. For a full arch, roughly two-thirds of the tray depth is usually right.
Step 3: Seat the Tray
For upper teeth: tilt your head slightly forward (not back — you don't want material running toward your throat), centre the tray over your upper arch, and press down firmly and evenly. The tray should seat so that the material contacts all your teeth at once.
For lower teeth: press the tray down over your lower arch, then bite down gently and evenly — don't bite hard enough to compress the tray into the tray base, but enough to ensure good contact on all teeth.
Make sure the tray is centred — not shifted left or right.
Step 4: Hold Still
Hold the tray completely still for 90 seconds to 2 minutes. Do not move your jaw, tongue, or lips during this time. Any movement creates smearing or distortion on the impression surface.
Breathe through your nose. If you feel the urge to gag, try focusing on a fixed point, breathing slowly, or lightly pressing your tongue to the roof of your mouth.
Step 5: Remove the Tray
Once set, the alginate will have firmed to a rubbery consistency — it won't feel liquid anymore. To remove: break the seal by pushing down slightly on one side (for upper) or lifting one side (for lower), then remove in one clean motion. Don't rock or wiggle — pull cleanly.
Step 6: Inspect the Impression
Check your impression immediately before the alginate dries further. Look for:
✅ Clear, sharp tooth definition — you should be able to see each individual tooth's shape, edges, and surface clearly
✅ No voids or bubbles across the biting surfaces of the teeth
✅ Full arch captured — the impression includes all teeth you want covered, plus one or two either side
✅ No smearing or drag marks — which indicate the tray moved during setting
If you see significant voids, bubbling across multiple teeth, or obvious smearing, redo the impression with a fresh mix. Most kits include enough material for 2–3 attempts per arch.
Step 7: Let It Set Fully and Package
Leave the impression to firm up for 5–10 minutes before handling. Once fully set, place it carefully in the return packaging — the impression should fit snugly without pressure on the tooth surface. If included, keep the impressions in the sealed bag; alginate can shrink slightly if left exposed to air for too long.
Send the impressions back as soon as possible — ideally the same day or the next day.
Common Mistakes and How to Avoid Them
Mixed too slowly or unevenly → lumps in the material → voids in the impression. Fix: mix vigorously and consistently for the full 45–60 seconds.
Used water that was too warm → alginate set before the tray was fully seated. Fix: always use cold or room-temperature water.
Moved the jaw during setting → smeared or distorted impression. Fix: seat the tray, then hold completely still. Don't swallow, talk, or move your tongue.
Tray wasn't centred → one side of the arch captured clearly, other side shallow. Fix: check tray position before the alginate sets.
Removed too quickly → impression still partially liquid, surface damaged on removal. Fix: wait the full 90–120 seconds before pulling.
Tray overfilled → material overflowed into the throat, causing gagging and tray movement. Fix: fill to approximately two-thirds of tray depth.
How to Know If Your Impression Is Good Enough
A usable impression shows clean, sharp definition on every tooth you want covered. Run your eye across the surface — you should be able to trace the exact outline of each tooth, see the spaces between teeth clearly, and identify the curve of the gum line.
If the most important teeth (the ones you want grillz on) have sharp, clean definition, the impression is likely usable even if some back teeth are slightly less crisp.
If you're unsure whether your impression is good enough, take a photo and send it to the Ice Jeweller team before posting — we can advise whether it'll work or whether a redo will save time in the long run.
What Happens After You Send the Impressions
Once your impressions arrive:
- Your teeth are scanned or modelled from the physical impression
- CAD design — your grillz are designed digitally around the exact shape of your teeth, including the style, stone layout (if applicable), and tooth count you specified
- Preview — you receive a CAD preview for approval before anything is cast
- Production — once approved, the grillz are cast, finished, and (for stone-set pieces) hand-set
- Delivery — shipped to you with free UK delivery
For a full timeline of what to expect, see our grillz timeline guide.
Frequently Asked Questions
Is the impression kit really free? Yes — Ice Jeweller ships impression kits at no cost. You pay for the grillz when you order; the kit is provided as part of the process.
What if I make a mistake with my impression? Most kits include enough material for multiple attempts. If you run out, contact us and we can arrange a replacement. The most common issues (bubbles, smearing) are usually fixable with a second attempt once you know what went wrong.
Can I use the impression for both top and bottom grillz? Yes — take separate impressions for your upper and lower arch. Even if you're only ordering one arch now, it's worth taking both while you have the kit.
Do I need any special equipment? No — just the contents of the kit, cold water, and a clean workspace. A mixing bowl and spatula help but aren't essential if they're not included.
How do I store my impressions if I can't post them immediately? Seal them in the provided bag and store at room temperature — not in a hot car or in direct sunlight, which can cause the alginate to dry and distort. Post as soon as you can, ideally within 24 hours.
What if my teeth have unusual spacing, missing teeth, or crowns? Custom impressions work with all tooth types — the material captures whatever is there. If you have significant gaps, crowns, or other considerations, mention this when ordering so it can be factored into the CAD design.
Ready to Start?
Get your free impression kit sent to your door — no upfront payment needed.